Sunday, March 13, 2011

Sunday, February 6, 2011

My Camera Accessories


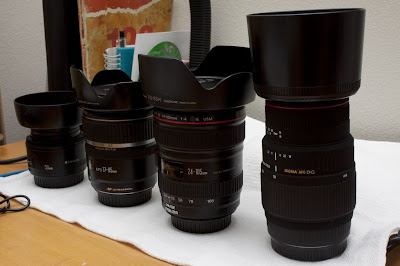
Canon 24-105 USM IS Lens
Purchase on 5/2/11 is first of the expensive lens in my life.
Camera purchase on september 09 $2300.

Saturday, February 5, 2011

Nelson lives 20 yrs


谢谢您在杨家住了二十年,没有机会看您最后一脸是很心痛。也希望您到好的新生活。还有您母亲Nornny我也没机会见它,真是疑惑
So Sorry.

Sunday, December 19, 2010

How to Use Flash for Night Portraits

Night Portraits can be tricky and generally require experimenting with artificial lighting. In this post Christina from ChristinaNichole Photography shares some tips on using Flash for Night Portraits.

As many of us approach the dead of winter, we photographers must deal with our natural light disappearing by 4pm or earlier. The possibility of cool natural lit portraits becomes less and less likely. Still yet, the portrait photographers must go on. Here is a technique for FLASH-lit portraits, inside or outside, after the natural light has all but gone.

Equipment:

SLR, and 1-2 Speed lights.

Step 1: Set Your Camera

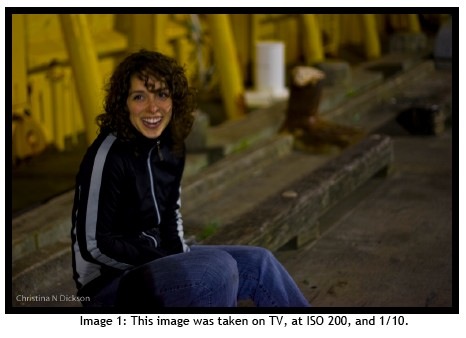
You want to shoot on TV with your shutter speed at 1/10-1/30, and your ISO set to somewhere between 200-400. If you have Canon speed lights on ETTL, your flash will automatically adjust itself for the light necessary to compensate for the lack of exposure as set by your camera.

For example:
night flash-portraits-1.jpg

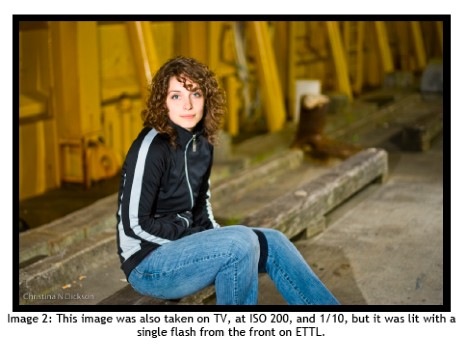
night flash-portraits-2.jpg

  • The first image is no flash. I was set to ISO 200 at 1/10th of a second. Its horribly lit and blurry.
  • For the second image I have retained the same camera settings, I simply have added one front flash. The slow shutter speed has enabled me to use the ambient light in the scene and this evens out the lighting in the entire image. The flash also “froze” my subject so I don’t have to worry about camera shake.

Step 2: Determine the Look of Your Image

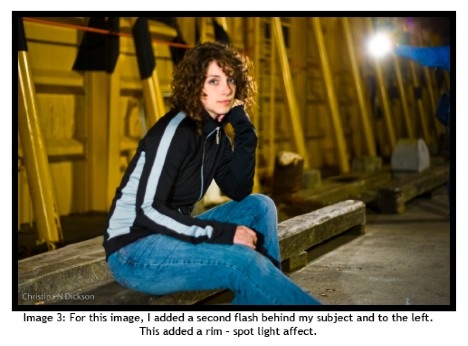
  • The direction of your flash will determine much about the outcome of your image. For example, in the previous image there was one flash that lit my subject from the front. You can discern this by attention to the direction of the shadows that extend behind our subject.
  • When the flash comes behind our subject, as in this image, it creates a rim-light halo affect.

night flash-portraits-3.jpg

Step 3: Set up Your Flash

  • Play with the angles of your flash. Your flash can be “behind to the right” of your subject, or “directly behind” your subject, and both angles will completely change the look and feel of your portrait.

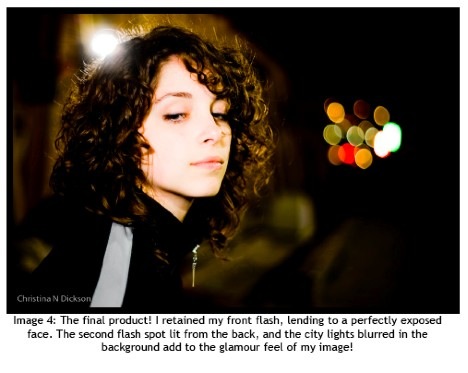
night flash-portraits-4.jpg

Your end result will be fun glamour style night portraits!

Don’t be afraid to play around with your flash and your settings. Many creative solutions come from discoveries. Let yourself have fun and relax. When studied and properly used, flash can tend to some fantastic images


Read more: http://www.digital-photography-school.com/how-to-use-flash-for-night-portraits#ixzz18WKnzCcN

Friday, November 26, 2010

Monday, November 15, 2010

方炯鑌 遺憾 HIGH QUALITY MV (完整版) [With Lyrics]

方炯鑌(阿鑌) 壞人MV

那 一扇車門 關出 我們的裂痕 一聲就震斷了回頭的路程 愛 無法均分 以後 就留給你們 也許用傷害結束 愛才更動人 容忍的人其實並不笨 只是寧可對自己殘忍 既然愛不能恆溫 祝福就給你下一個人 你是好人 也是個壞人 對我坦誠 只為了朝他狂奔 不能放任 所以放了 這點痛我還能忍 我是好人 也是個壞人 分得夠狠 你才有藉口轉身 寧願愛 一點不剩 也不忍 看戀人愛成路人 容忍的人其實並不笨 只是寧可對自己殘忍 既然愛不能恆溫 祝福就給你下一個人 你是好人 也是個壞人 對我坦誠 只為了朝他狂奔 不能放任 所以放了 這點痛我還能忍 我是好人 也是個壞人 分得夠狠 你才有藉口轉身 寧願愛 一點不剩 也不忍 看戀人愛成路人 三個人從不對等 總有個人必須犧牲 那永恆 就等他帶你完成 你是好人 也是個壞人 對我坦誠 只為了朝他狂奔 不能放任 所以放了 這點痛我還能忍 我是好人 也是個壞人 分得夠狠 你才有藉口轉身 寧願愛 一點不剩 也不忍 看戀人愛成路人 寧願愛 一點不剩 也不忍 看戀人愛成 路人

Monday, November 1, 2010

7 Tips for Great Photos in the Dark


Shoot During Dusk

Some of the best night photos are taken during dusk; when the sky isn't completely black. Taking pictures during dusk will show more colors and details in the distance and will let you use a faster shutter speed.

Use High ISO

Use a high ISO if required. It is better to get recognizable photos of your friends that are grainy than blurry photos. You can reduce noise with image editing software but you can't remove blur.

Keep it Steady

Taking photos at night requires slow shutter speed. To shoot bright pictures without the blur at night, use a tripod or monopod to keep your camera steady.

In addition to using a tripod or monopod, enable your cameras mirror lockup setting and gently press the shutter. If your camera doesn't have mirror lockup, you can use the self timer mode instead.

If you don't have a tripod or monopod with you, find some support objects to keep your body and arms stable. For example, you can lean on a wall or place your elbows on a table to keep your arms steady. If there's nothing to help keep you steady, stand with your legs far apart from each other and hold your breath while taking the picture.


Motion Blurs

Not all blurs are bad. Some blurs such as motion blur can add interest. Try shooting photos of moving objects, or deliberatly move your camera to create a motion blur. Zooming in while the shutter is still open will also add an interesting forward-motion effect.

Freeze your Friends

When taking photos of your friends at night, combine flash with a long exposure. The flash will freeze the foreground and the long exposure will reveal the background. Because people tend to move right after they see the flash, set the shutter curtain sync to the second curtain (Usually in the custom functions settings). This will fire a flash just before the shutter closes instead of in the beginning. Using second curtain sync will also put your friends in front of any motion blur so nothing is covering their faces. Second curtain sync is available in most new digital SLR cameras but rarely seen in point and shoot cameras.

Shoot for High Dynamic Range (HDR)

Place your camera on a tripod and shoot three exposures: one darker, one lighter, and one just in the middle. Your camera may have auto exposure bracketing to help you with this. Load the images into Photoshop and create HDR file out of the three exposures. Now you have a HDR image that you can apply tone mapping to to reveal more details. Tone mapped night photos can give results similar to shooting during twilight with more post-processing control.

Shoot Several and Stack

Sometimes when you shoot long exposures, noise and hot pixels will appear even at the lowest ISO setting. To overcome this problem, shoot the same photo a few times (more is better), and use Photoshop CS3 image stacking to combine the analyze the image to remove noise and hot pixels.

  1. Start Photoshop CS3.
  2. Open the File> Scripts menu and choose Load files into Stack
  3. Click the Browse button and load all the images.
  4. Checkmark the "Create Smart Object after Loading Layers" and click OK.
  5. Open the Layers> Smart Objects> Stack Mode menu and choose Median.

Powered By Blogger